Customizing Templates
You can access the template settings by navigating to Settings Tab > Template in Obsidian. There are two types of templates you can work with:
- Simple templates: These can be edited directly in the settings tab.
- Advanced templates (Ejectable): These are saved as markdown template files and need to be ejected into the template folder for further editing.
For our templates, we use the eta (opens in a new tab) template engine, similar to the engine that powers the Templater (opens in a new tab) plugin.
Edit Simple Template
For the sake of simplicity, let's start with a simple template. As an example, if you want to include only the title in the note filename, you can replace the default template with the following and press Apply Button:
<%= it.title %>.mdEdit Complex Template
For more complex customization like note content, you'll need to work with the markdown template files, which cannot be edit before being ejected into the template folder.
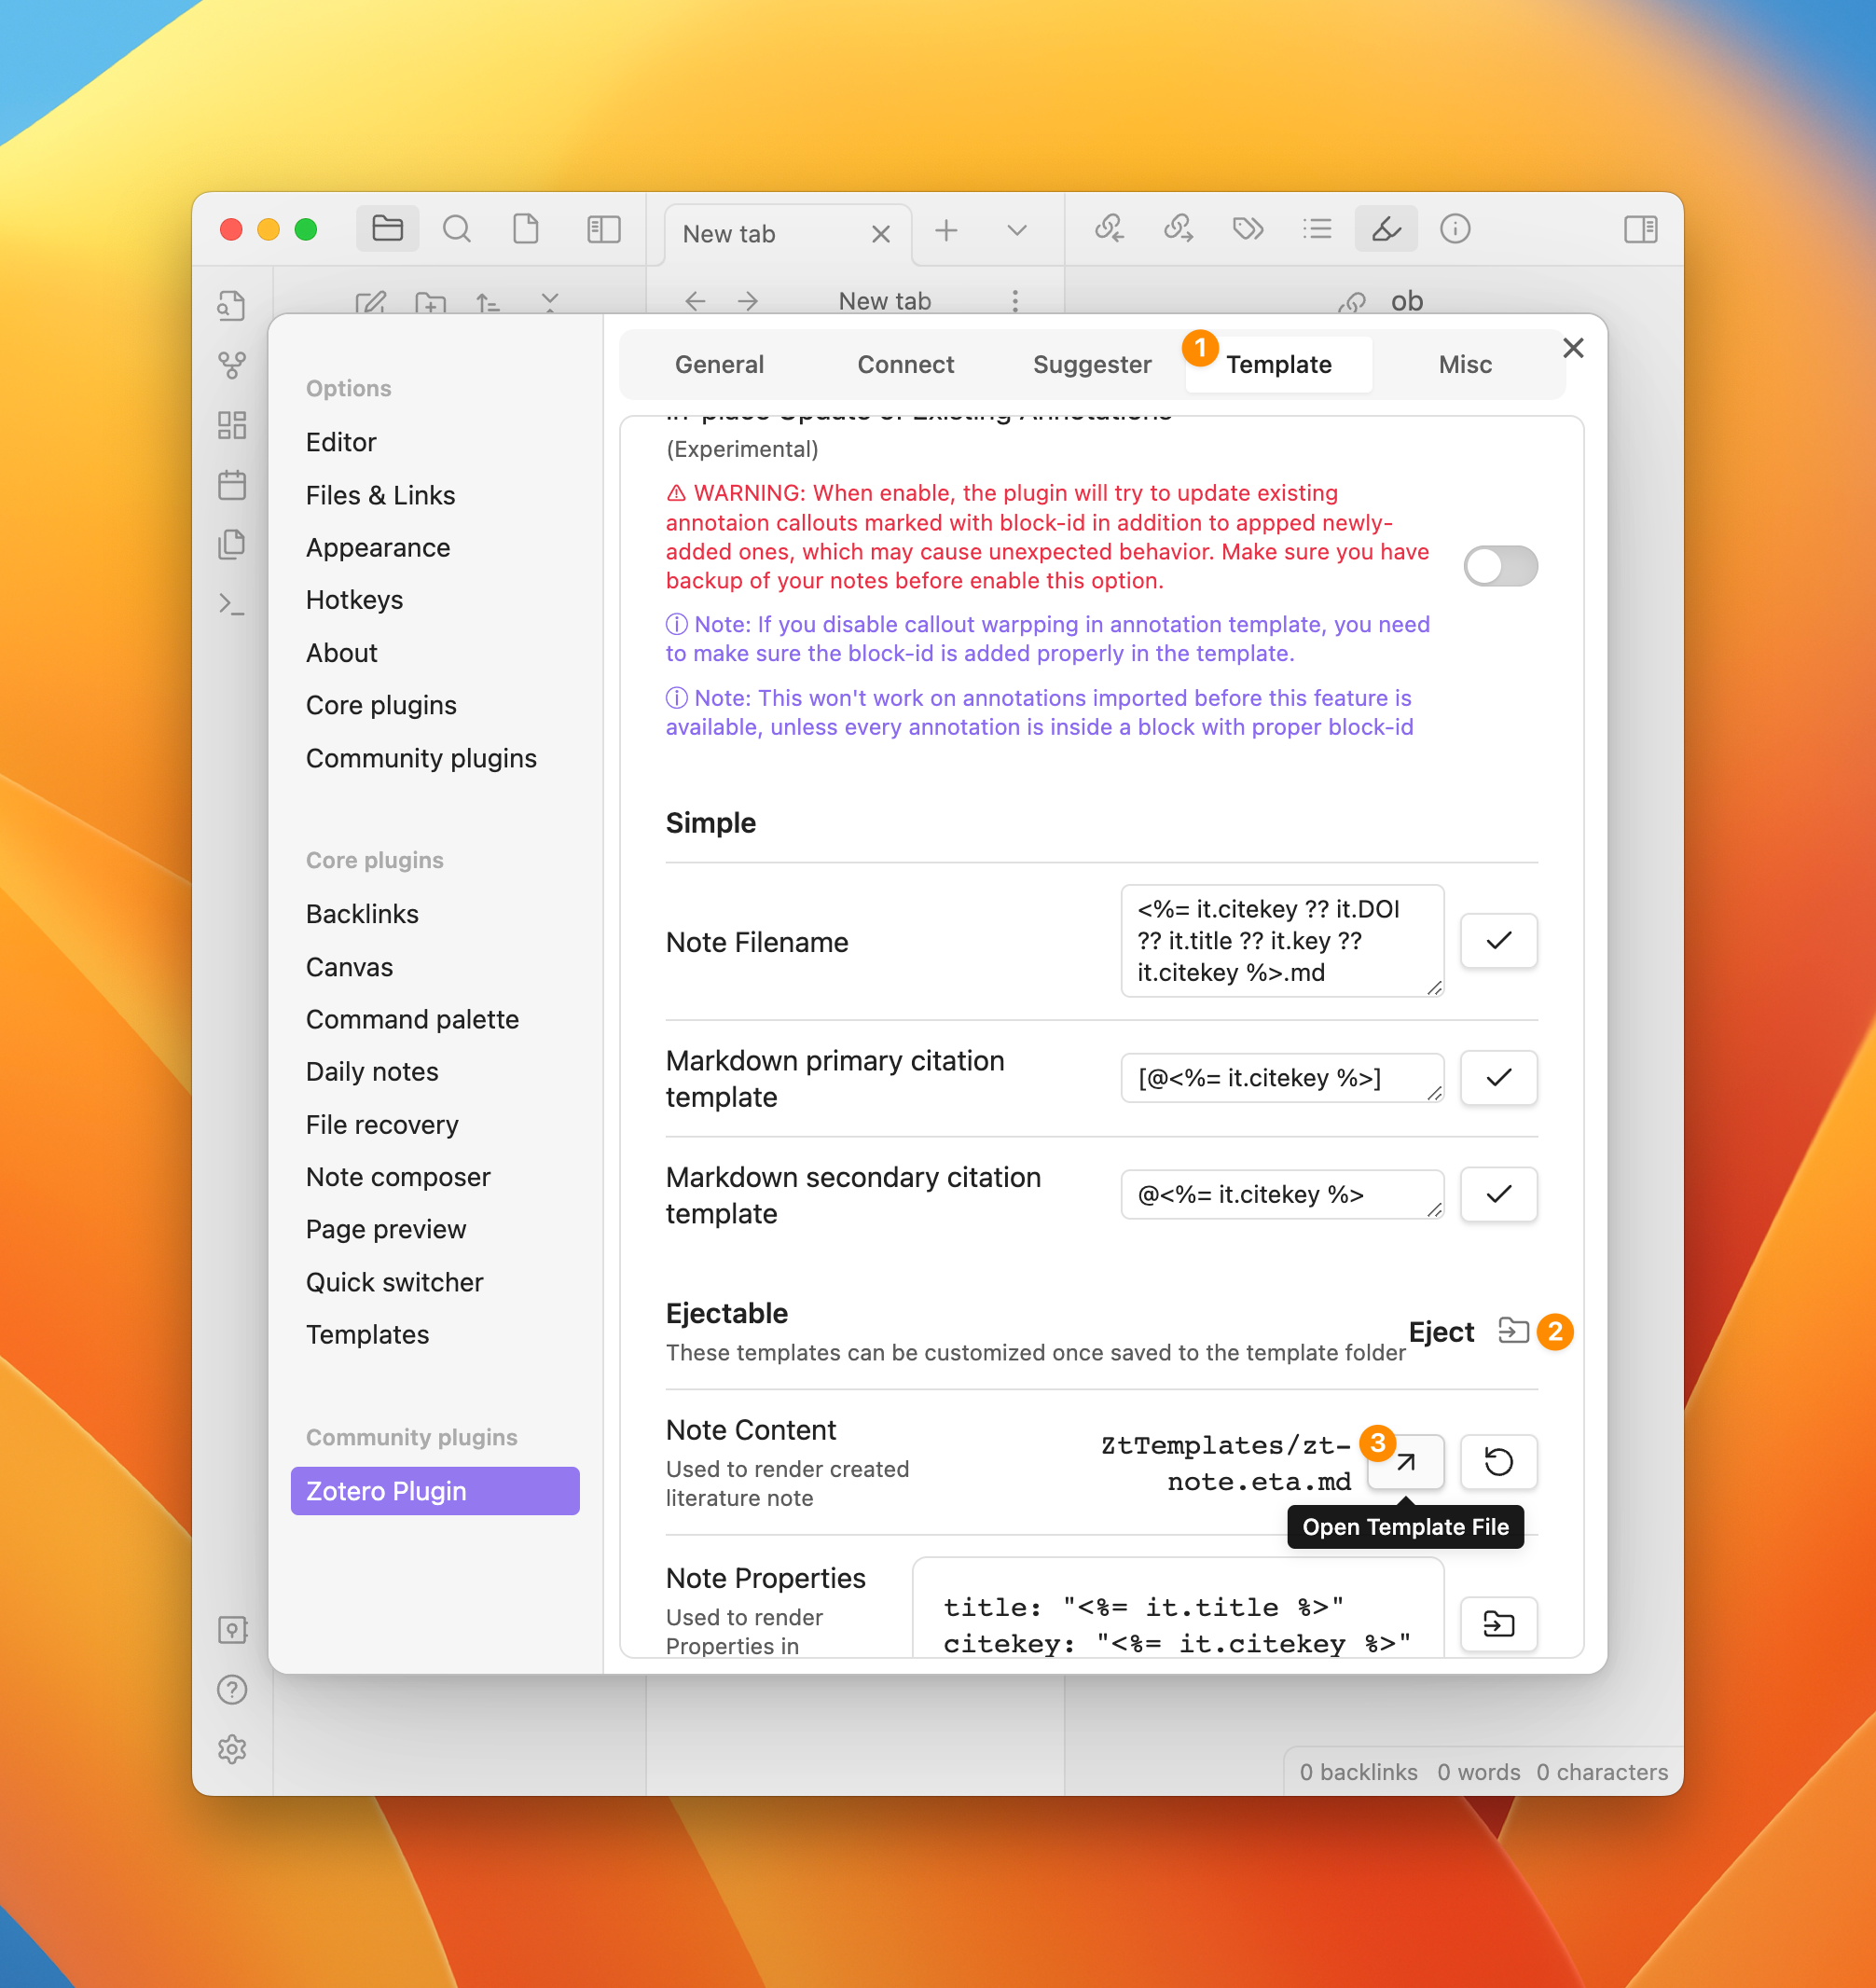
Go to the Template Settings
Navigate to Template > Ejectable in Obsidian Settings Tab
Eject the Template File
Click the "Eject" button right to Section title to eject the template file into the template folder.
ZtTemplates folder by defaultOpen "Note Content" template editor
Click Open template file button next to template file path to open the template editor.
Edit template
The first column is the template file editor where we can edit the template. we'll discuss the other two columns later.
Use Live Template Editor
To make the template editing process easier, we provide a live template editor. You have just open it in the previous step. The live template editor is a split view with the template file editor on the left and the previews on the right.
The preview are blank if you haven't selected any item. To select an item:
Open Annotaion Panel in Obsidian
We'll discuss the usage of annotation panel in details later, for now, we only need it to select an item for preview.
- Open command palette
- Select
Open Zotero Annotation View in Side Panelcommand
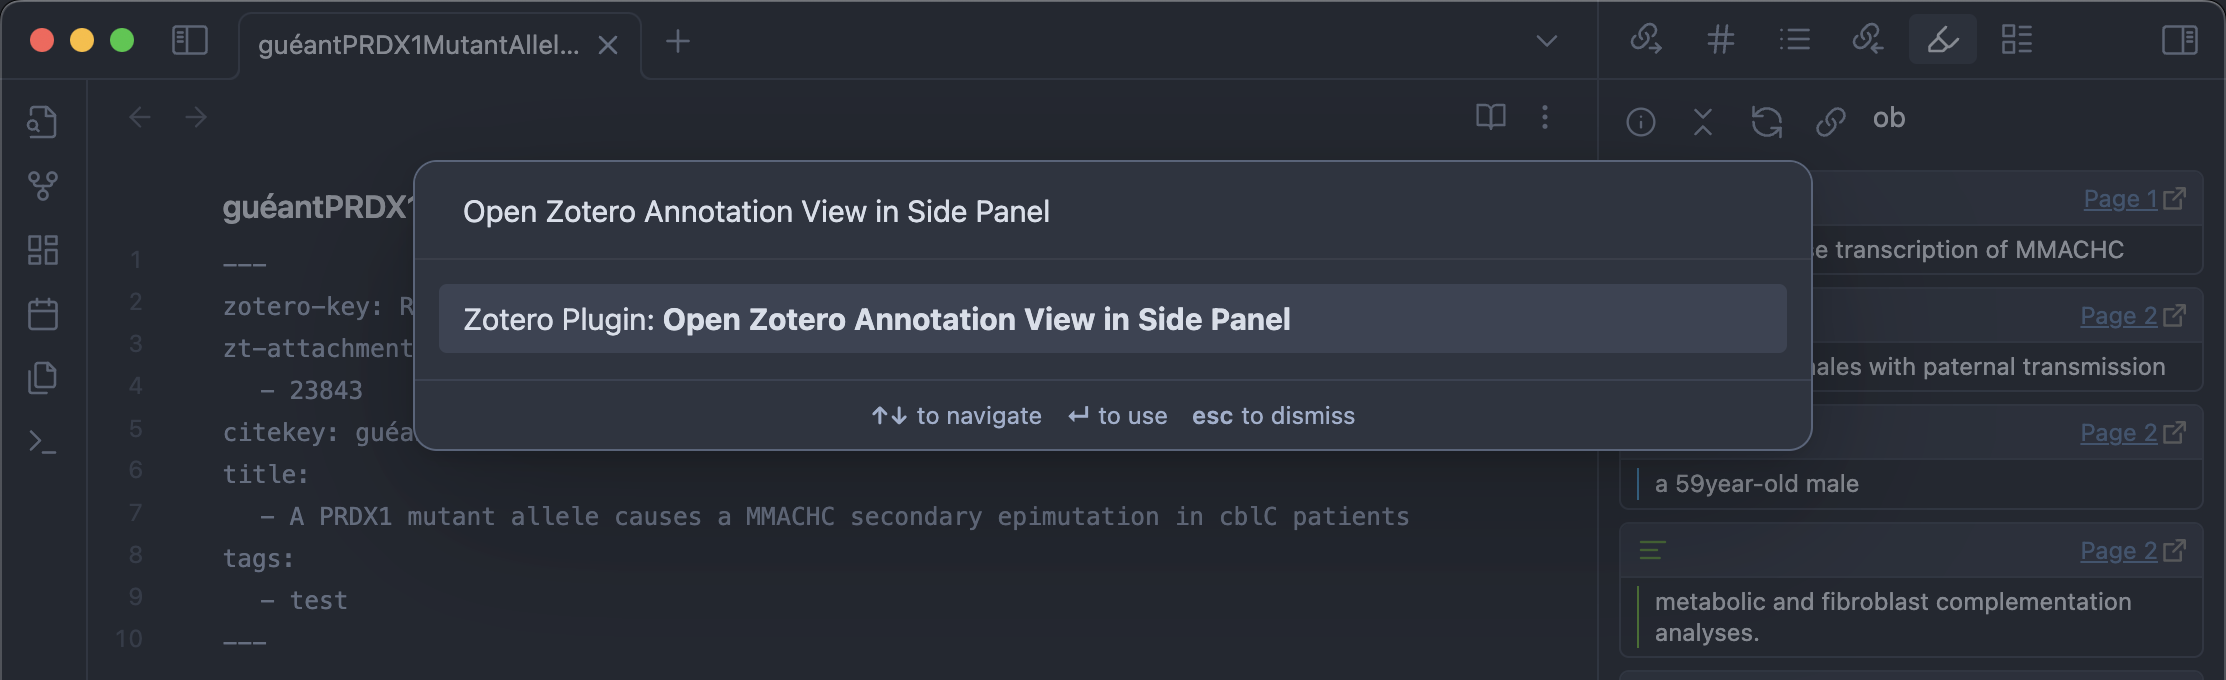
You should see the annotation panel opened on the right side of the screen.
Pick a literature to preview
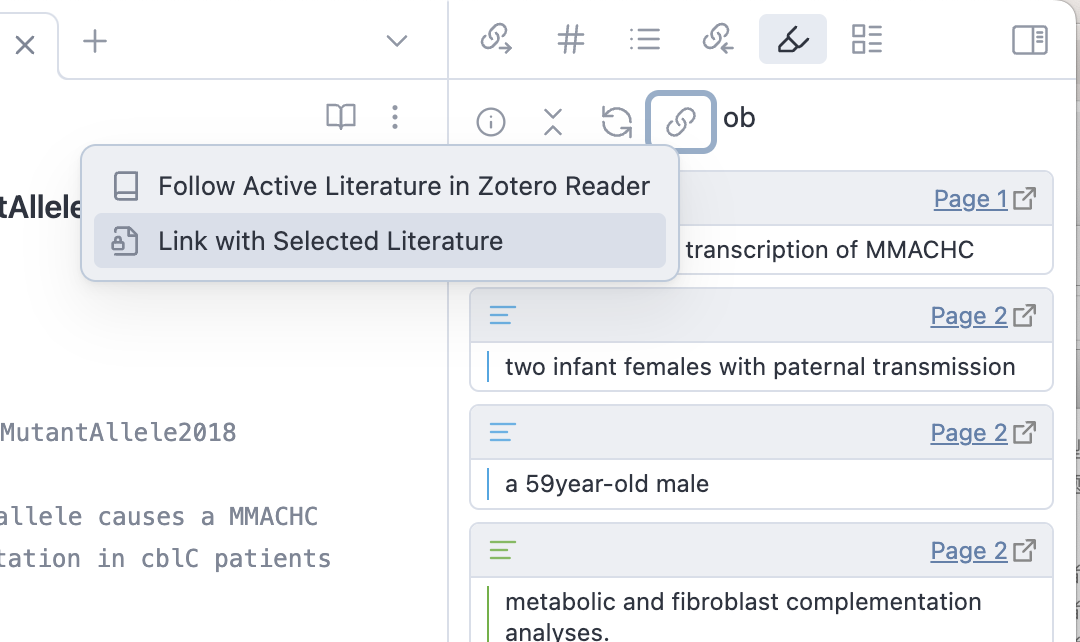
- Click on
Choose Follow ModeButton - Select
Link with Selected Literatureoption - Select a literature in the popup searchbox
You should see the preview updated with the selected literature.
Preview item details
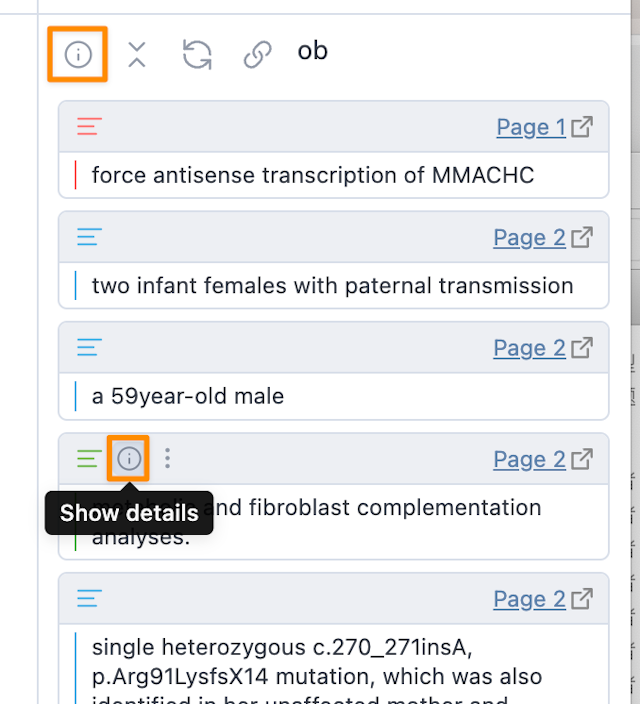
Click on Show Details button at the top left, you should see the details of the selected literature opened in the editor.
The full template editor looks like this:
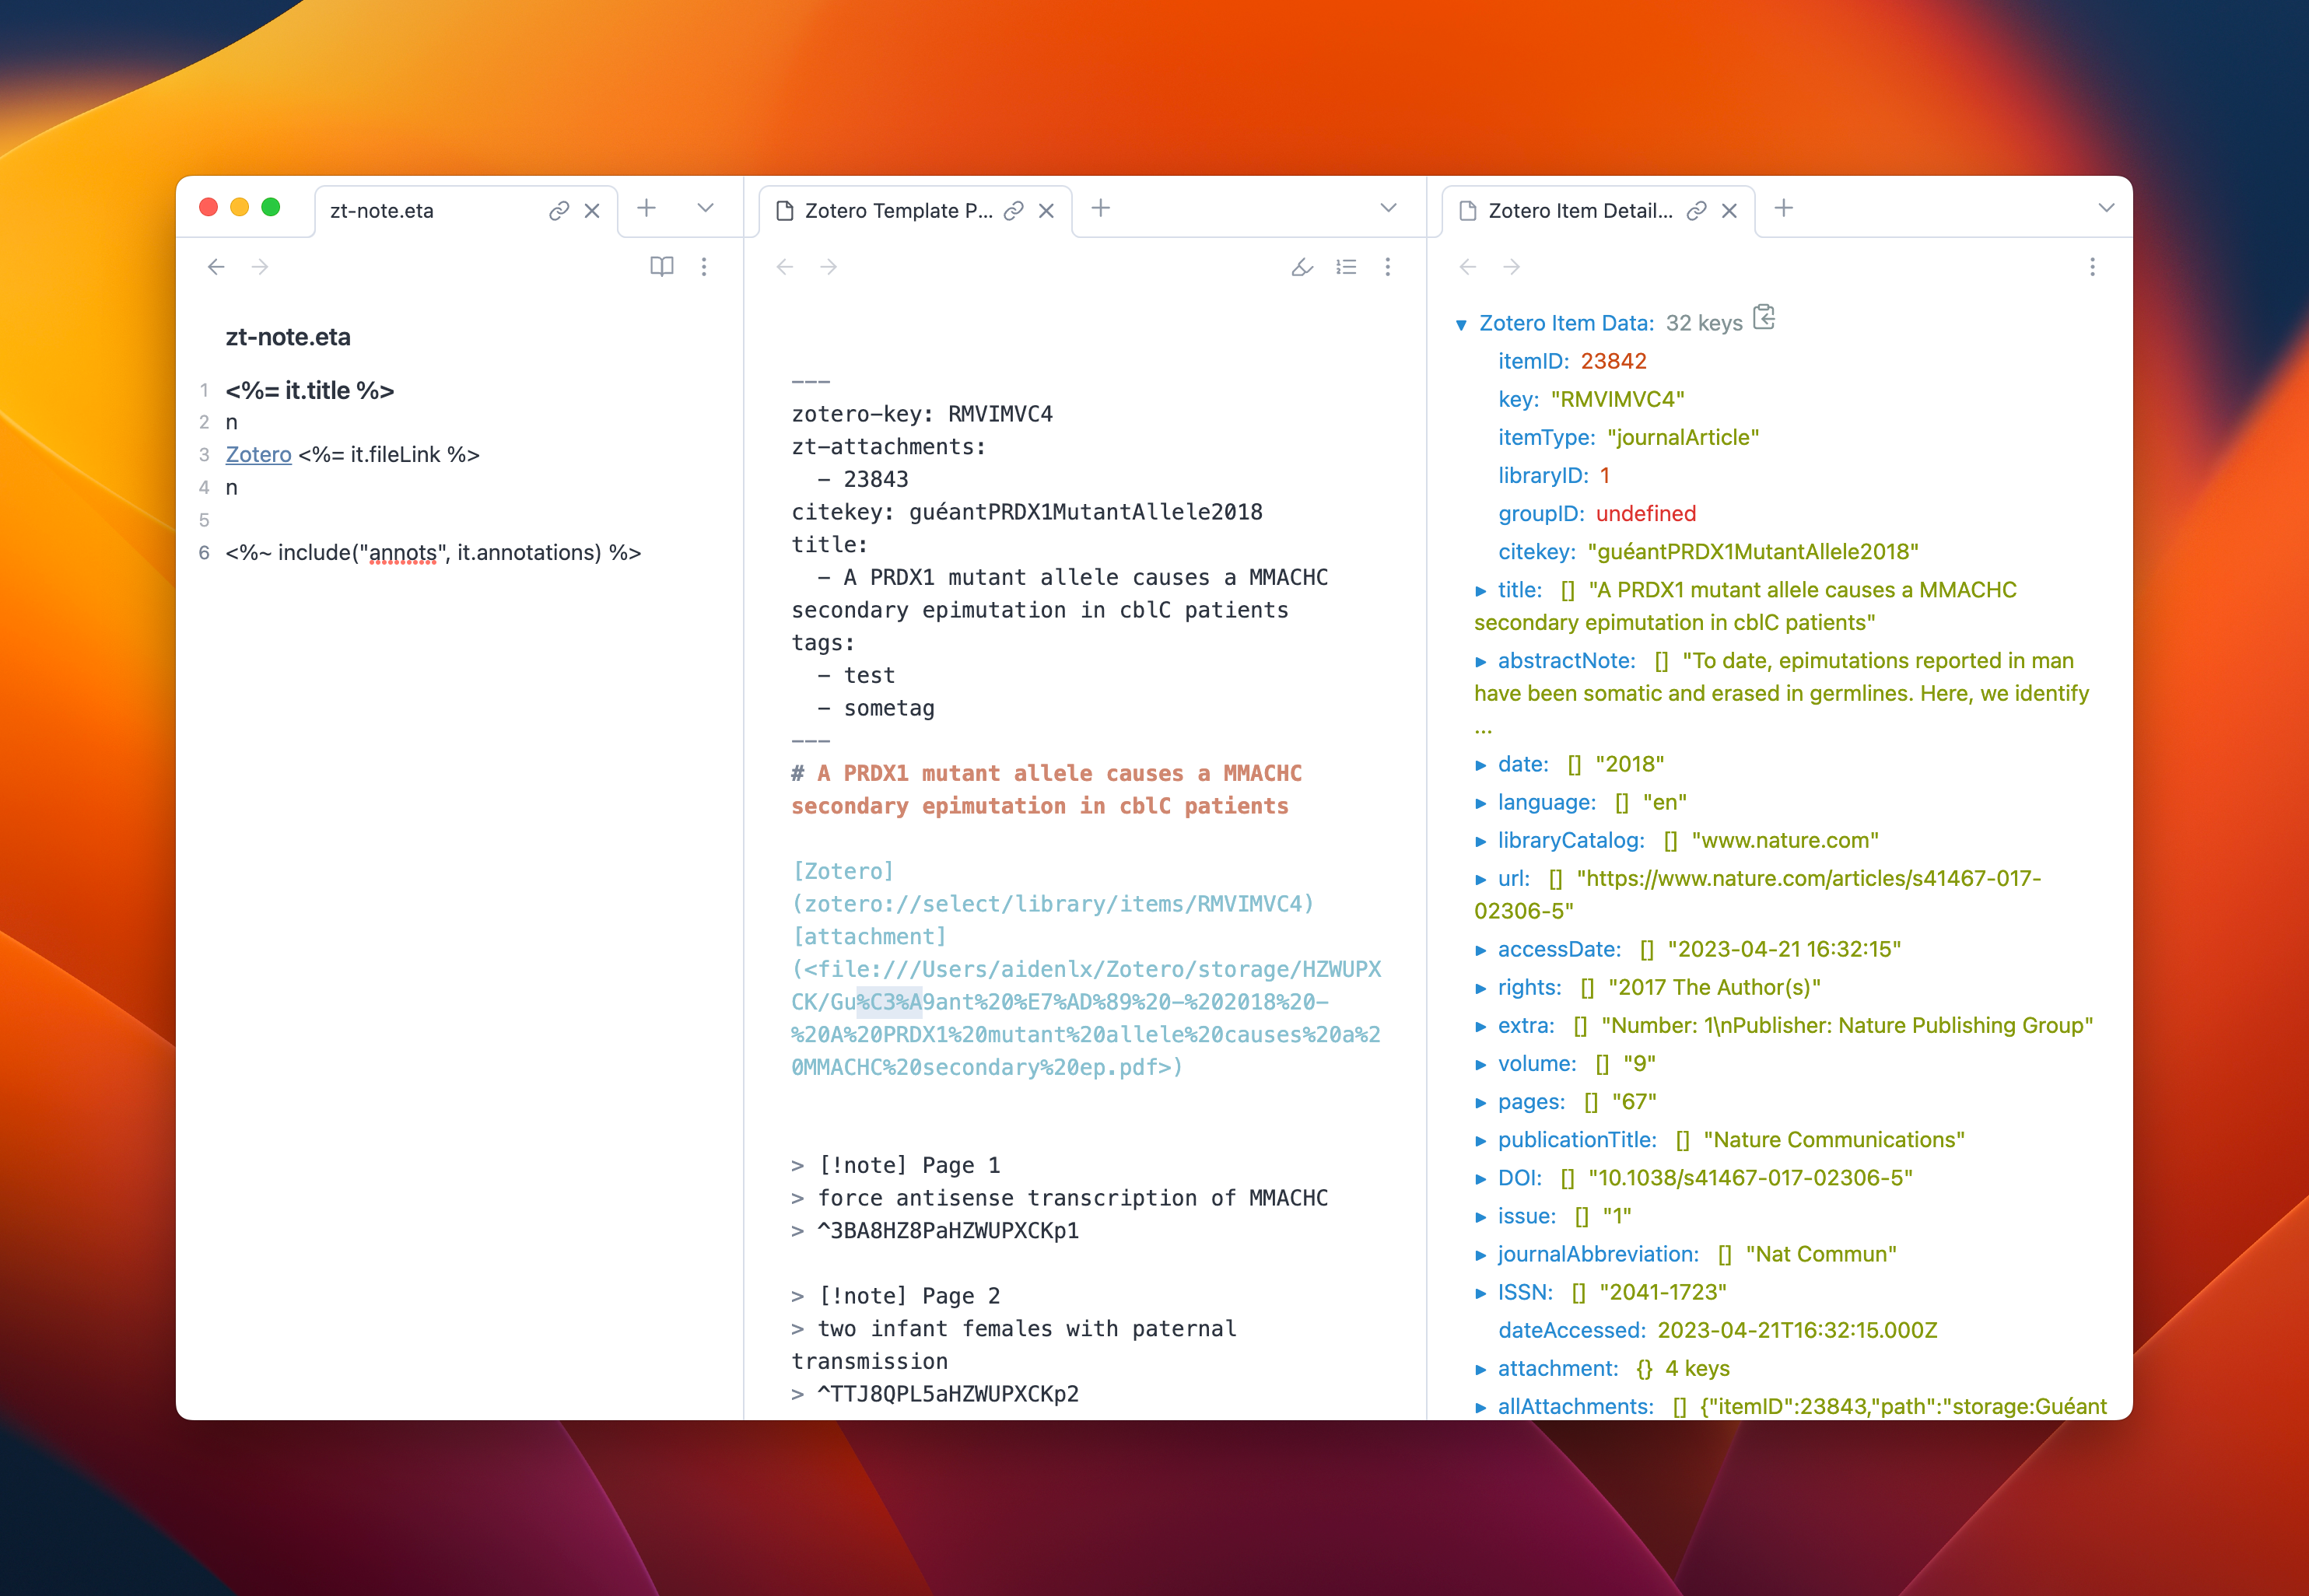
In the template editor, you can:
- Edit the template file on the left
- Preview the template in the middle with data from selected item
- View all the available data of the selected item on the right
We'll show you how to make use of all these features in the following sections.
Customize Each Template
- zt-field.eta
- zt-note.eta
- zt-annot.eta
- zt-annots.eta
Setup Note Properties Template
Let's start with the Note Properties template. By default it looks like this:
title: "<%= it.title %>"
citekey: "<%= it.citekey %>"
This is a YAML (opens in a new tab) template. It's used to set the frontmatter (opens in a new tab) of the note. You can add any frontmatter you want in this template.
Note the quoted <%= it.title %> and <%= it.citekey %> in the template. For most scalars you don’t need any quotes at all, but if you need to define some piece of data which contains characters that could be mistaken with YAML syntax you need to quote it in either double " or single ' quotes for the YAML file to stay valid. As simple rule of thumb, if your data contains any of these characters :-{}[]!#|>&%@ better quote it. Also quote it if you want a string but it could be mistaken for a valid number (integer or float) or if it consists only of “Yes”, “No”, “yes”, “no”, “true” or “false”, which would be converted to a boolean without quotes.
For example, if you want to add the tags field to the frontmatter, you can add the following line to the template:
tags: [<%= it.tags %>]In this example, we warp the tags field with [] to make sure tag containing space characters like my tag are parsed properly. If your tags may contain special characters like [] or , mentioned before, you can use JSON.stringify to escape them:
tags: <%= JSON.stringify(it.tags) %>For more examples of Note Property Template, please refer to How-to section.
This template is, by default, parsed using Obsidian's bulti-in YAML parser before being applied to the note. You may notice the resulting frontmatter is not exactly the same as the template.
If you prefer formatting frontmatter yourself, you can disable the YAML formatter by adding the following line to the template:
---
raw: true
---
Note: if note properties in literature note is updated, the formatter will
kick in, breaking the previous formatting regardless of raw: true setting,
due to Obsidian API to update frontmatter properties.
Update Note Content Template
The default template looks like this:
# <%= it.title %>

[Zotero](<%= it.backlink %>) <%= it.fileLink %>
<%~ include("annots", it.annotations) %>
Saying that we want to include the abstract of the literature in the note content. If you have opened the template editor with a literature selected, you should see the abstractNote in the item details preview, like the following. You can right-click on the abstractNote and select Copy Template (Pick first element) to copy the template code to the clipboard.
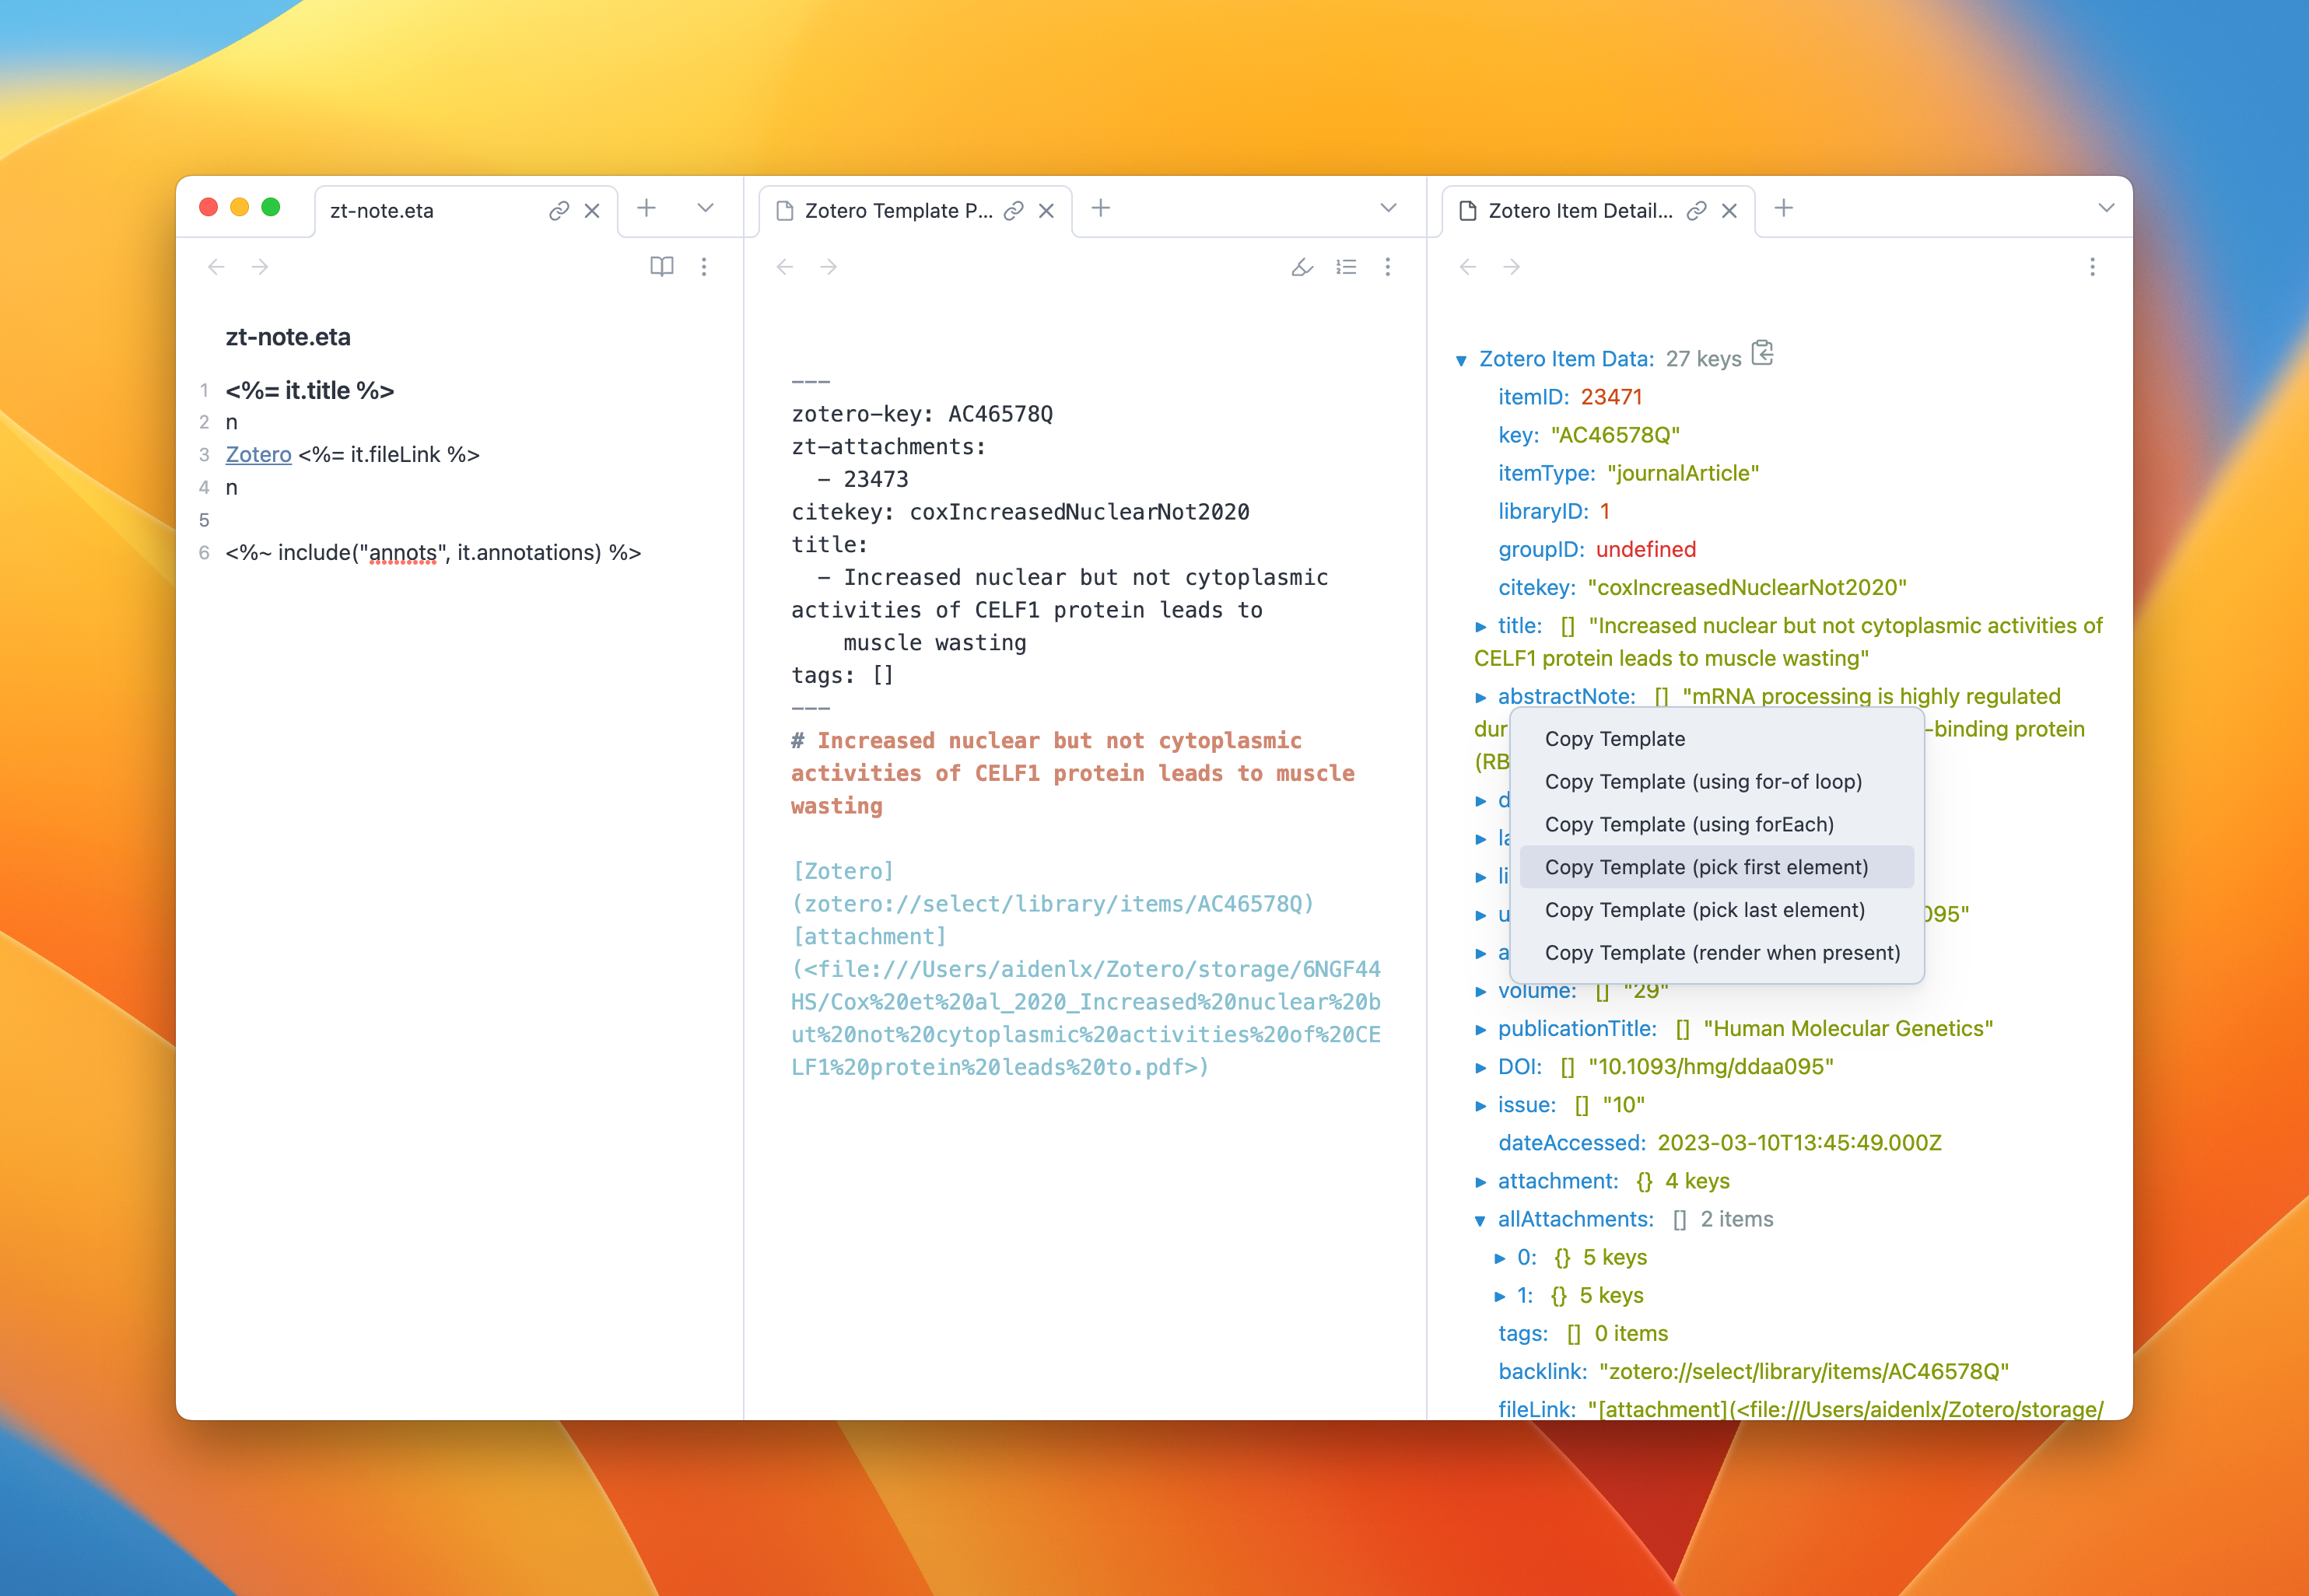
Note the green [] after the abstractNote in the preview. This means that
the abstractNote is an array. If it's {}, it's an object that have
multiple properties inside. You can expand both of them to see the details.
Now you have <%= it.abstractNote.first() %> copied into your clipboard. Paste the template code to the template file editor to anywhere you want, and you should see the template preview updated with the abstract.
Update Template for Each Annotation
Assuming that the literature you selected has annotations, you should see the annotation panel filled with the annotations like so:
You can click on the Show Details button on the header of each annotation to preview with that annotation.
The default template for each annotation looks like this:
[!note] Page <%= it.pageLabel %>

<%= it.imgEmbed %><%= it.text %>
<% if (it.comment) { %>
---
<%= it.comment %>
<% } %>
By default, the annotations are rendered as Callouts (opens in a new tab) with block ID, so that they can be tracked by the plugin for future updates:
> [!note] Page 1
> Some Excerpt
>
> ---
>
> This is a comment
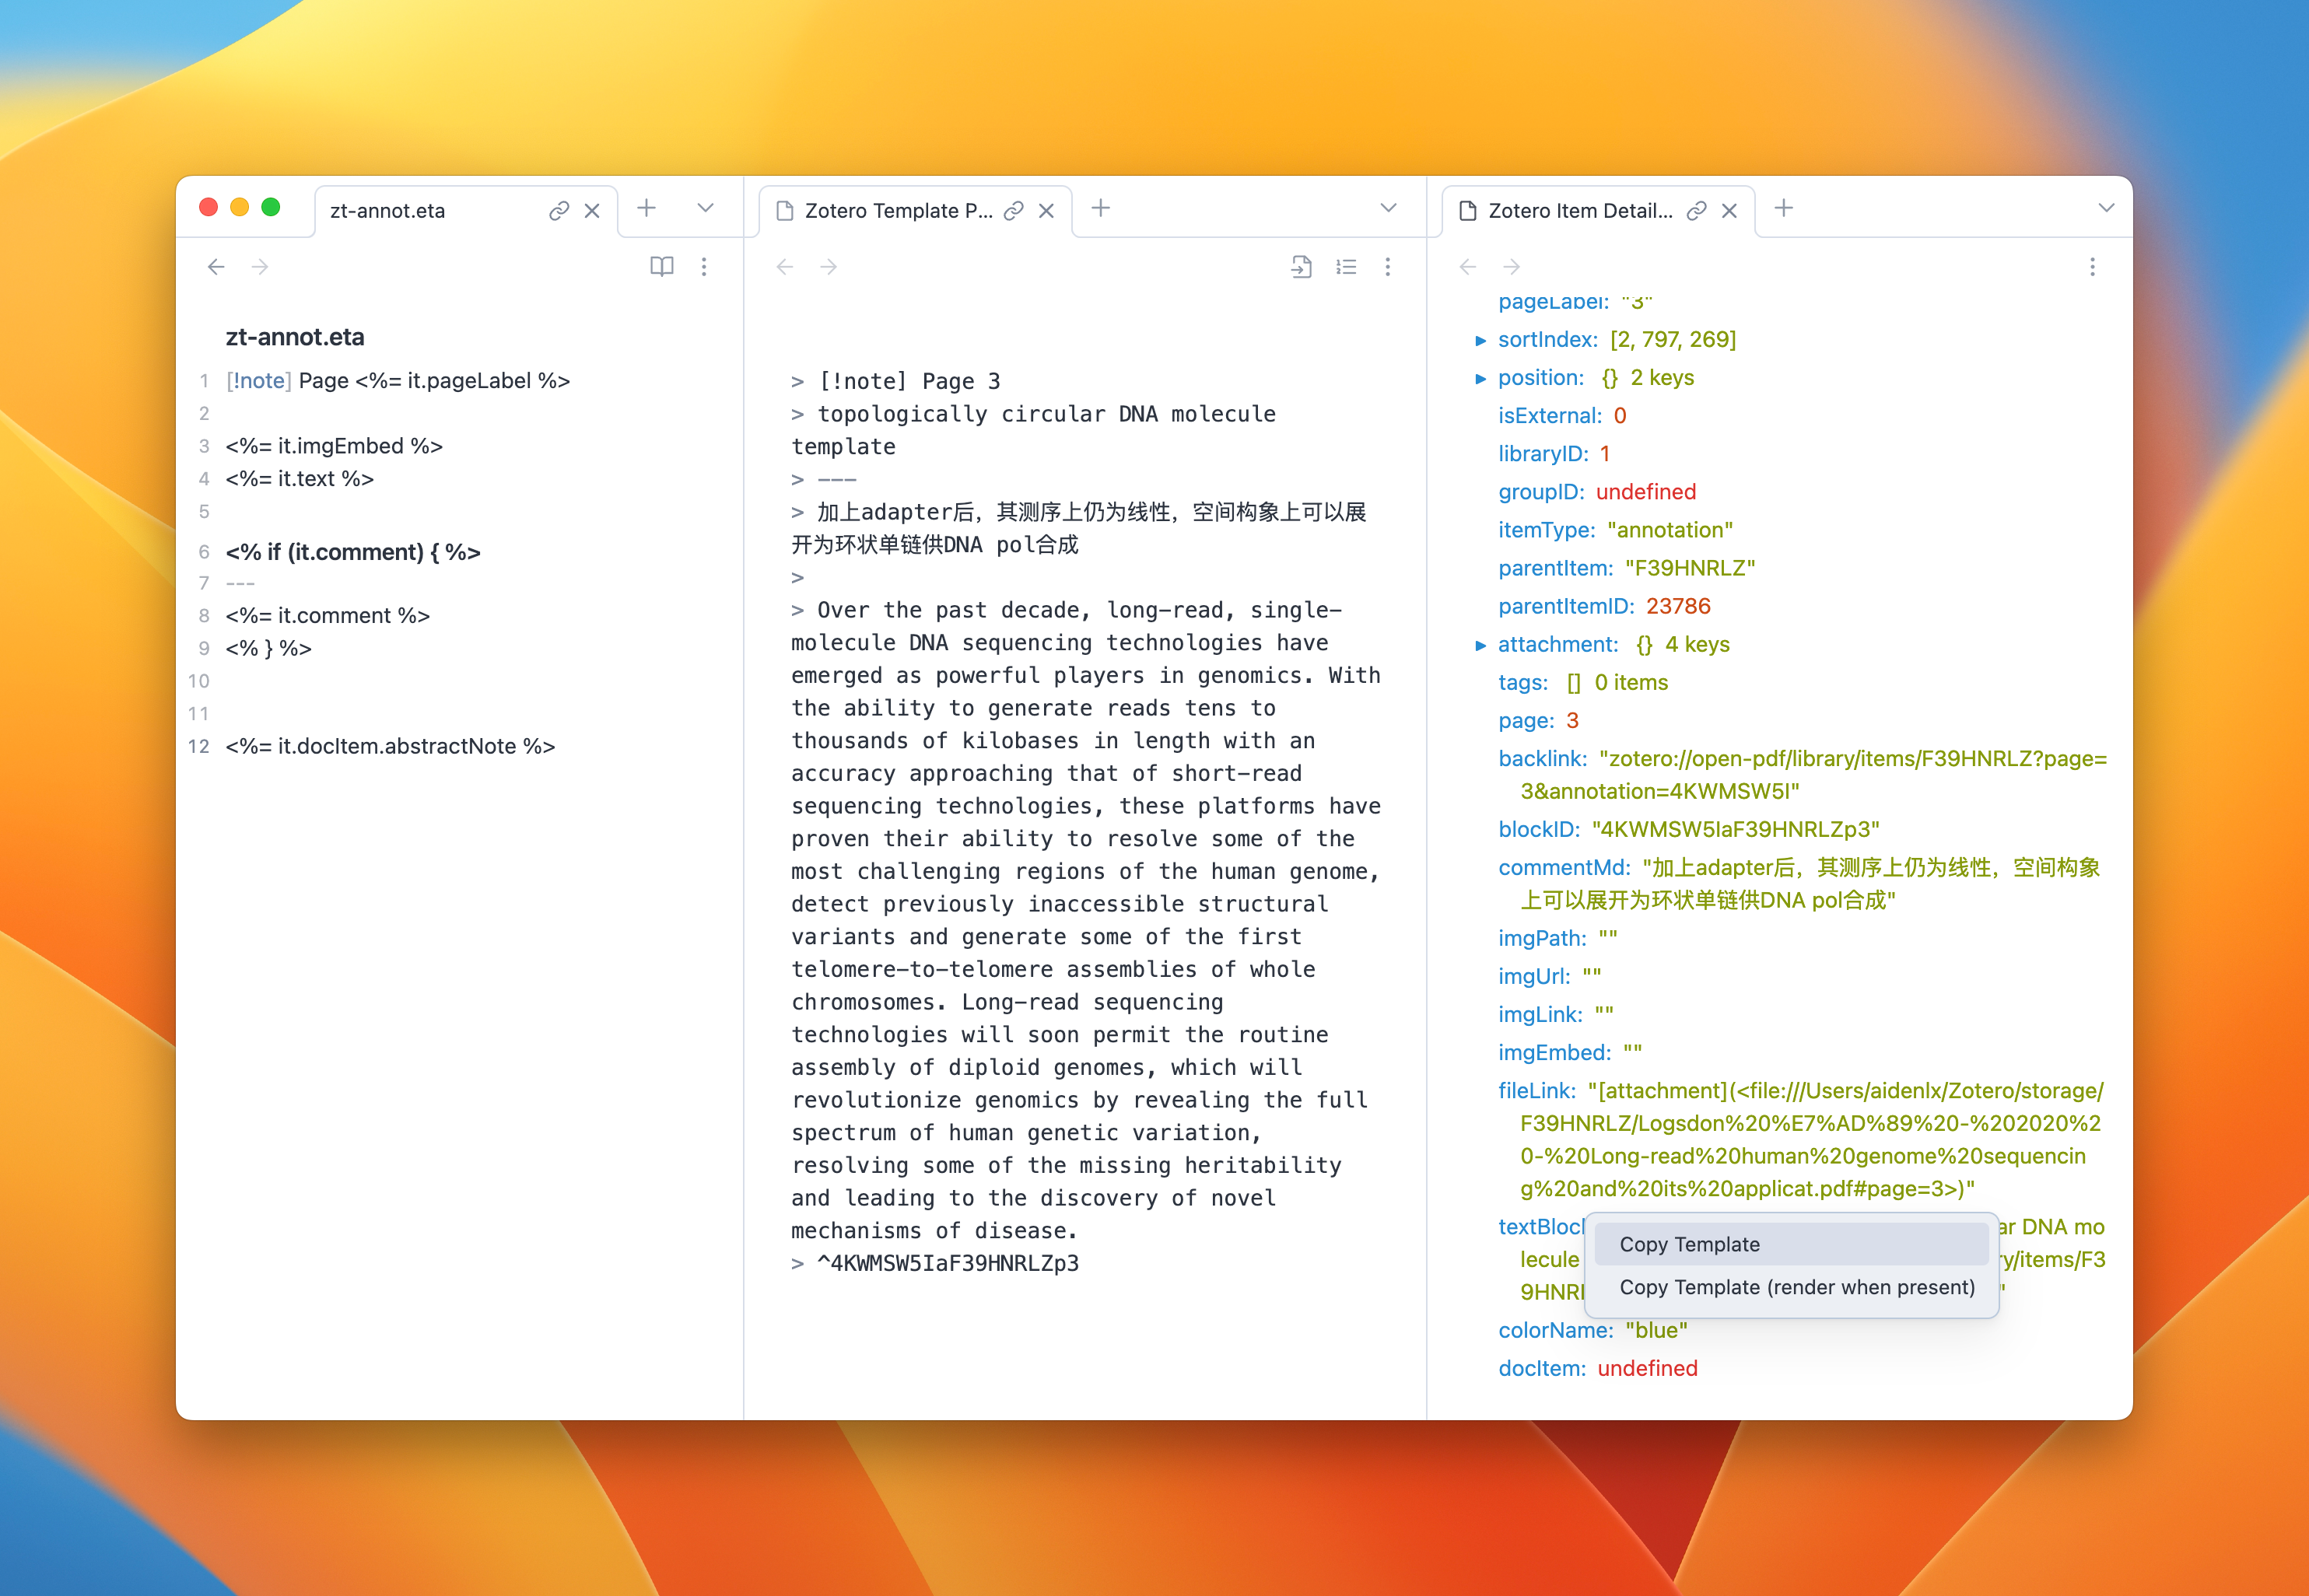
> ^LUE86KQFaF39HNRLZp2Suppose you want to add color as callout type instead of "note", you can find two variable about color in the annotation: color and colorName. Here we use colorName, which is human-readable color name instead of color code. Right-click on the abstractNote and select Copy Template.
Paste it into [!note] to replace it. Your template should look like this:
[!<%= it.colorName %>] Page <%= it.pageLabel %>
...
You should see the preview updated with the color name.
In addition, if you want to add the title of the literature to the annotation, you can't find it in the annotation details. This is because those info about parent literature are stored in it.docItem. So to add the title, you can use <%= it.docItem.title %> in the annotation template.
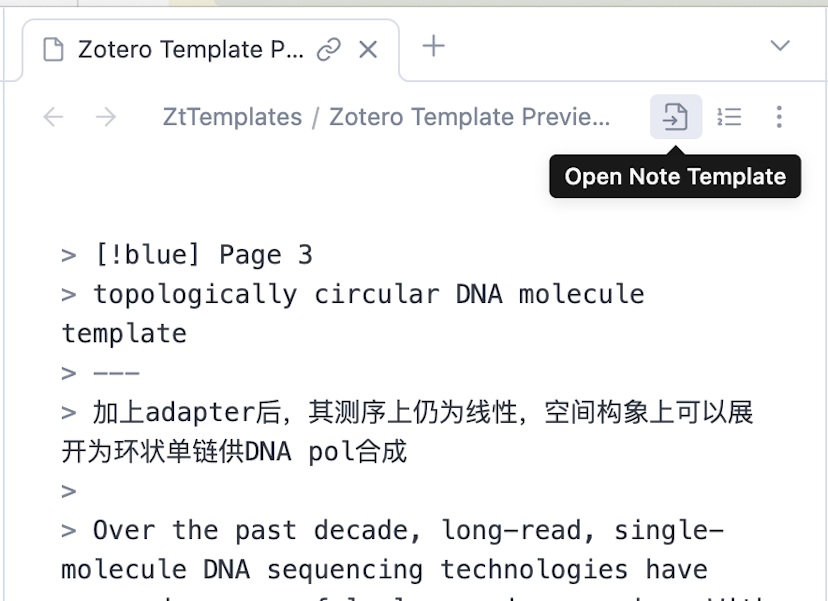
If you want to check the details of the parent literature, you can use the switch buttons in the header of template preview panel. In this case, you can click on Open Note Template button to switch to the parent literature to see details.
Template for Batch Importing Annotations
You may notice the <%~ include("annots", it.annotations) %> in the Note Content template. This is a special syntax to include another template. In this case, it's the template for batch importing annotations, named annots.
First, let's click on Open Template for Annotations Button to open the template editor for annotations.
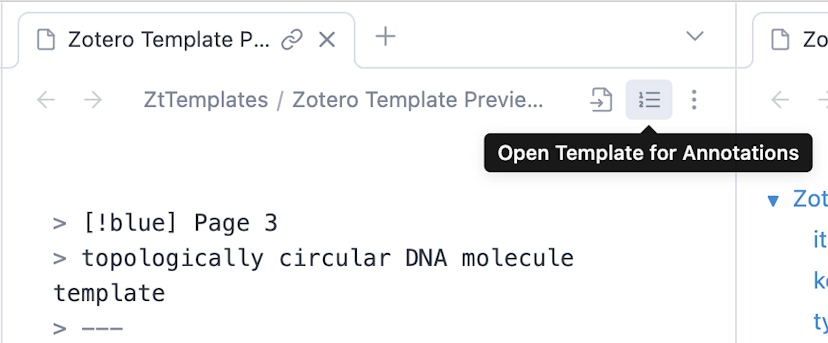
The default template for annotations looks like this:
<% for (const annotation of it) { %>
<%~ include("annotation", annotation) %>
<% } %>
This is a loop template. It loops through all the annotations and pass each annotation to the annotation template. The annotation template is the template we just edited in the previous section.
Now, let's say we want to add a divider between each annotation. We can add a divider in the annots template:
<% for (const annotation of it) { %>
<%~ include("annotation", annotation) %>

---
<% } %>
You should see the divider added between each annotation in the preview.
That's all about customizing templates in Obsidian-Zotero. In the next section, we will delve into how you can keep your literature notes up-to-date with the latest changes in Zotero.
List of Partial templates
List of Partial templates
We use Partial (opens in a new tab) and include function to reuse some parts of your templates.
Here is a list of all the templates that can be used as Partial:
| ID | Template Name | Description |
|---|---|---|
annots | Annotations | The template for multiple annotations |
annotation | Annotation | The template for each annotation |